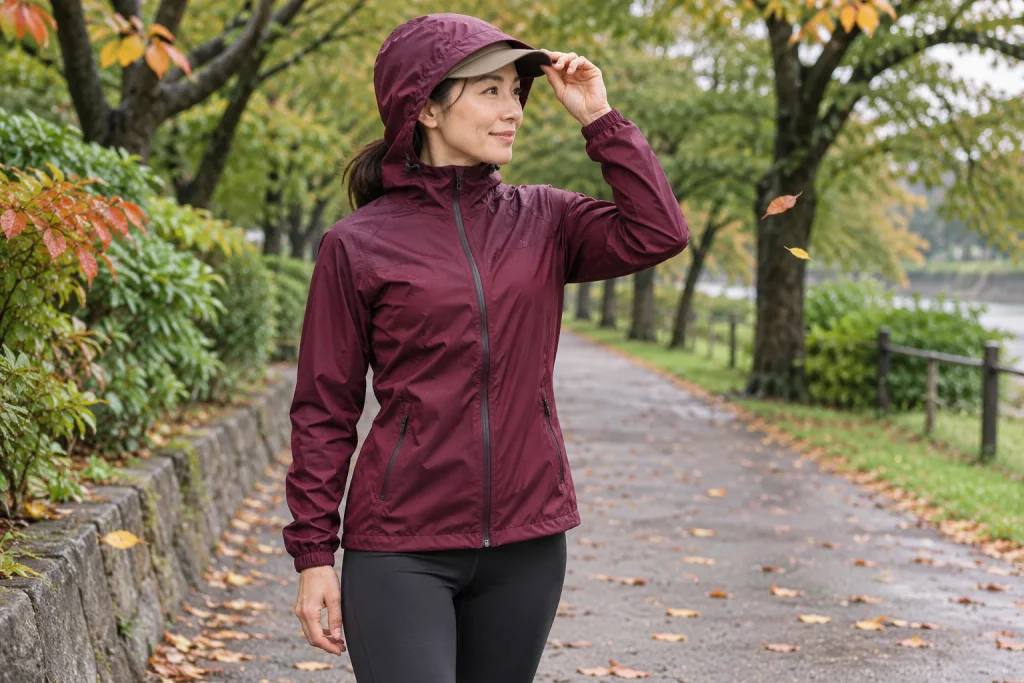
A running jacket’s hood becomes truly personal when you turn your head. It may look tidy from the front, yet when you glance over your shoulder, fabric can bunch beside your face, the peak may point elsewhere or the entire opening may shift. A size label and the name of a waterproof fabric tell you little about this. The following checks help you work out how the hood, jacket, hat underneath and movements you actually need while running fit together on your own head.
Starting from manufacturers’ designs, we offer original, everyday checks. This is not a visual field examination, a standardised wind laboratory or a road-safety certification. Suitable places are a quiet shop, your hallway at home or a safe outdoor spot separated from traffic. A junction or moving traffic is no longer a place for adjusting kit: there you need a functioning combination tried in advance.
The face opening and movement with the head are separate questions
Salomon’s running-jacket guide lists an ergonomic hood and a small integrated peak among details to consider. Rab’s guide distinguishes between hoods designed for different activities, mentioning a light, close-fitting design for trail running. These are manufacturers’ design considerations; they do not establish that a model works identically on every head shape. Your own check adds information about use to the description.
Keep two observations separate. First: where does the face edge sit at rest, and does it leave clear the area through which you look around? Second: when your head moves, does the hood follow it or remain aligned with the jacket body? An opening can be wide while the hood follows your head poorly; a hood can move well with your head but have been tightened too much. These phenomena raise different adjustment questions.
A relaxed, forward-facing stance is a good starting point. Notice the fabric beside the corners of your eyes, the area around your chin and the position of the peak before adjusting anything. Then change one adjustment only and look at the same position again. This reveals what the cord or strap changed, rather than leaving you to work backwards from an accidentally over-tightened result to discover which part is bothering you. Knowing your starting setting also helps you restore it quickly later.
Start with the clothes you actually run in
A thick winter hat, a thin running hat and a bare head fill the same hood differently. If you perfect the adjustment without a hat in the shop but always run in a peaked cap, an important part of the check is missing. Bring the headwear and glasses you actually use. You do not need to model every season at once: first find a working setting for your most frequent, specific combination.
Wear a realistic layer under the jacket too. A thicker top can change the space around the neck and shoulders, while a running vest can influence how the jacket stays on your torso. If you regularly wear the vest over the jacket, check head turns with the shoulder straps in place too. If you wear it underneath, try that arrangement. The point is a repeatable situation of your own, rather than piling every possible item of kit onto yourself at once.
A short list in your phone can help later: which hat, which zip position and which top did you use? This is particularly useful when comparing two sizes, as you may adjust the whole combination differently by the time you try the second jacket. Matching conditions here simply means practical consistency. It does not turn a shop fitting into scientific measurement, but reduces the chance of attributing a difference between hats to the jackets.
 Enlarge image
Turn your head while standing: check both sides
Stop somewhere you can look around without also stepping or dodging other people. Keep your shoulders comfortably facing forward at first, then turn your head to one side and the other as far as you naturally do when looking around in everyday life. Do not strain your neck or seek a record. The question is whether the fabric follows your head during your usual movement and whether the face opening changes position.
Observe the middle of the movement and the return separately. The hood may sit well when turned to the side, but one edge may remain beside your face when you look back. In another case, the peak may turn while the rear catches on the hat. Do not reduce these to general labels of “tight” or “big”: name which part moved, in which direction and with which clothing. That makes the next adjustment attempt meaningful.
A mirror helps you observe the outside position, but cannot tell you what you can see past the fabric. If someone helps, ask them to watch how the hood follows your head while you focus on your own impression. A short recording can also capture the movement if there is a quiet place and everyone involved consents. Do not calculate field-of-view angles from this either: everyday observation aims to recognise obstructive shifting, not produce a medical or laboratory result.
What do a cord and rear strap adjust on a hood?
The location and function of adjustments differ between jackets. A mechanism that gathers the edge does not necessarily change the same thing as a volume-adjustment strap at the back of the head. First find your model’s instructions or ask a shop assistant for a demonstration. You can assess the result only when you understand which element you adjusted. A movement that worked on another jacket may not produce the same result here.
Adjust in small steps, then repeat the same head turn. If a change removes one shift but narrows the other side of the face opening, record both observations. “The tighter, the better” can easily mislead here. You are looking for a usable setting in which the hood does not wander around you but also does not pull the edge or chin area into an obstructive position. Both conditions matter together.
Check the position of cord ends and fasteners too. You do not need to alter the garment or build a new system with knots to discover whether a dangling element bothers you. Look for factory-provided routing or fastening options and use them as instructed. If the hood is tolerable only with an improvised alteration, that is useful information before buying. A properly fitting size or different cut may be a clearer solution.
The peak, hat and glasses together form the front arrangement
A small peak may be intended to keep precipitation farther from the face, but its actual shape still needs trying with your own combination. A hood peak and the peak of a cap underneath may rest on one another, displace each other or hold the face opening elsewhere. Check their relationship with your head straight first, then turn sideways and glance towards the ground. This ties the check to your everyday movements.
With glasses, pay particular attention to where the arms meet the hood edge. The fit may feel comfortable just after putting the jacket on, then press at another point or move the frame when you turn your head. Similarly, raising the zip at the chin can change the feeling of air and moisture around the glasses. We do not claim that one setting resolves all fogging: the check reveals which problem you experience with your own combination.
If something bothers you, change or adjust only one element at a time. For example, first compare the same jacket with and without a hat; only then try another jacket size. Otherwise, you see the result of three changes at once and cannot tell what helped. This is especially useful if you already have glasses you like and want to keep: you can fit the jacket around that fixed starting point.
Shoulder movement and zip position can matter too
A hood is not separate headwear: it connects to the neck, shoulders and the whole jacket. After turning your head, therefore, move your arms comfortably and look around again. Raise an arm only as far as naturally needed for ordinary dressing or handling equipment, then lower it. Notice whether the jacket and hood settle back or the area around your face remains elsewhere. Do this standing in an unobstructed place.
Try the zip in the position in which you expect to wear it in windy weather. A shop fitting with the jacket fully open does not reveal the relationship between a raised collar and the chin area. The reverse is true too: if you would regularly wear it partly open on a milder run, check that position as well. Keep the results for different zip positions distinct; the same jacket may settle differently around the neck in the two modes.
A simple comparison note needs only four lines: facing forward, looking sideways, the position after arm movement and the position after changing the zip. Add a specific observation to each, such as “when turning right, the left edge shifts”, rather than only a star rating. You can then retrieve why one combination was better. Your decision rests on movements important to you, rather than an impressive but hard-to-interpret final average.
 Enlarge image
Crosswinds require outdoor observation in a safe place
An indoor check reveals much about fit but does not fully reproduce behaviour in wind. If a permitted outdoor trial is possible, find a quiet place where you can stop without adjusting while watching other road or path users. Turn to different orientations relative to the wind and notice how the edge and peak move. This remains an impression of use at a particular moment, not a comparable measurement of wind speed.
Do not try to prove the jacket is good in dangerous weather. Strong gusts, the risk of falling branches or precipitation that makes navigation difficult do not provide a useful trial environment. If you can check the garment only in calmer conditions, limit your conclusion to those conditions. The precise statement is what you experienced in that combination and situation, not that the hood will be suitable in every crosswind.
If the hood starts bothering you while running, the next step is to stop safely and adjust it there. Do not experiment with a cord while approaching a junction or crowded section. At the first calm opportunity afterwards, check looking around again. Earlier practice helps: you already know what each adjustment does, so you are not trying to decipher an unfamiliar mechanism on the move in poor visibility.
Turning the check into a useful buying decision
When comparing two similar jackets, first identify your own deal-breaker. If fabric regularly shifts in front of your view during a natural head turn, a prettier colour or lower weight should not outweigh that in your mind. Equally, an adjustable part’s poor initial position need not be a final verdict: ask for help adjusting it, then repeat the check. Usability should be assessed in a setting you can actually achieve and repeat.
For online orders, clarify returns and trial-use conditions before trying the garment outdoors. A clean indoor fitting and an outdoor run may be treated differently under the retailer’s rules. Do not alter the hood, cut a cord or remove a part whose purpose you do not yet know. Ask about the particular model first; preserving its condition also makes a precise complaint or size exchange easier.
After a successful fitting, keep a short personal adjustment reminder: which hat, zip position and adjustment gave you comfortable vision when looking around? This is not a permanent certification. Different layers, headwear or a change in garment condition may justify another check. The aim is a familiar combination in which, once dressed, a few calm movements let you check that everything stays in the right place before you actually set off.
Sources and how to interpret the checks
Background on manufacturers’ hood designs comes from Salomon’s running-jacket guide and Rab’s waterproof-jacket guide, checked on 21 November 2026. The movement sequence, note templates and comparison examples are our own editorial suggestions. We report no measured field-of-view value, wind-speed limit or hands-on product test. The model’s instructions and your own calm fitting together help you interpret the particular hood.
How Futószív articles are prepared: our editorial guidelines.